Pop-Ups
Schedule Pop-Ups
To help you plan better announcements and alerts, Whatfix enables you to schedule Pop-ups to appear for a specified time and set them up on a recurring setting.
Pop-ups can be scheduled by one or more of the following:
- Start date
- End date
- Time zone
- Number of occurrences over a period of time
A few Example Use Cases are listed.
Use the following steps to schedule a Pop-up:
-
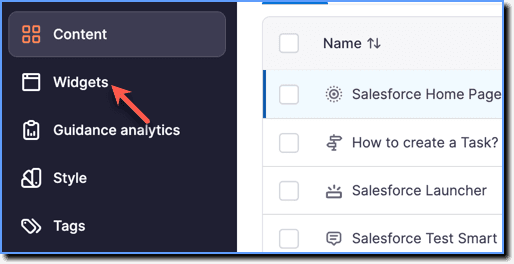
On the Whatfix Guidance dashboard, click Widgets.
-
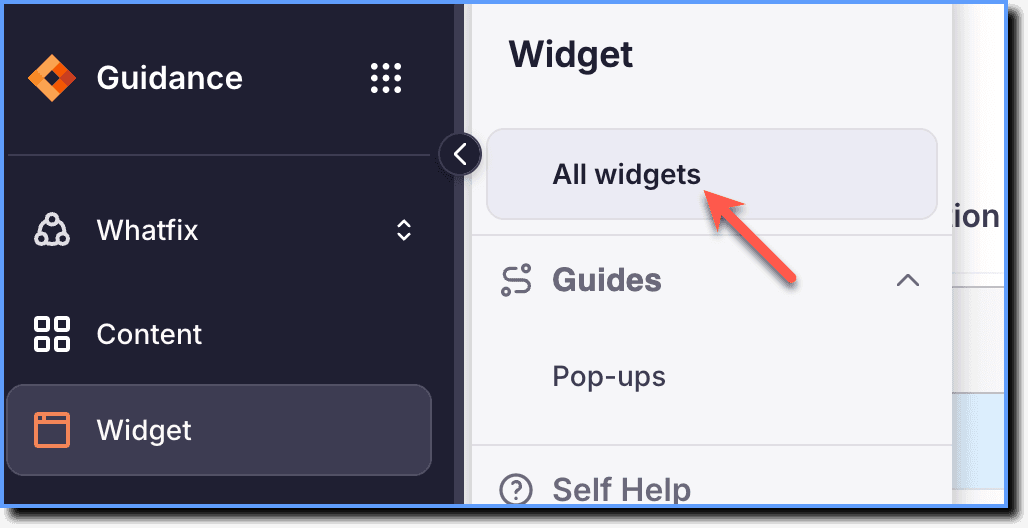
Click All widgets.
-
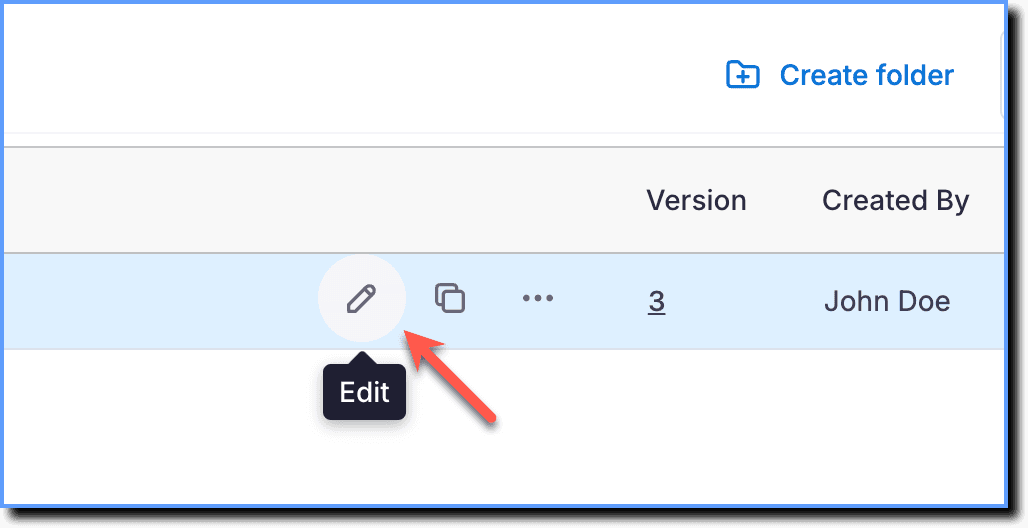
Hover your cursor over the Pop-up you want to schedule, and then click the Edit icon.
your title goes here
You can schedule a Pop-up while creating a new Pop-up as well.
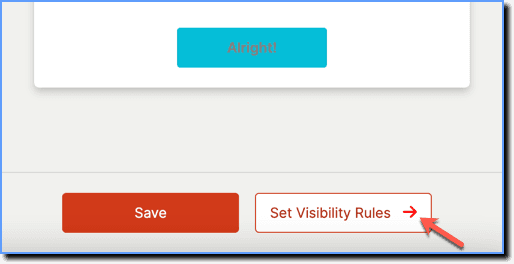
- Click the Set Visibility Rules button.
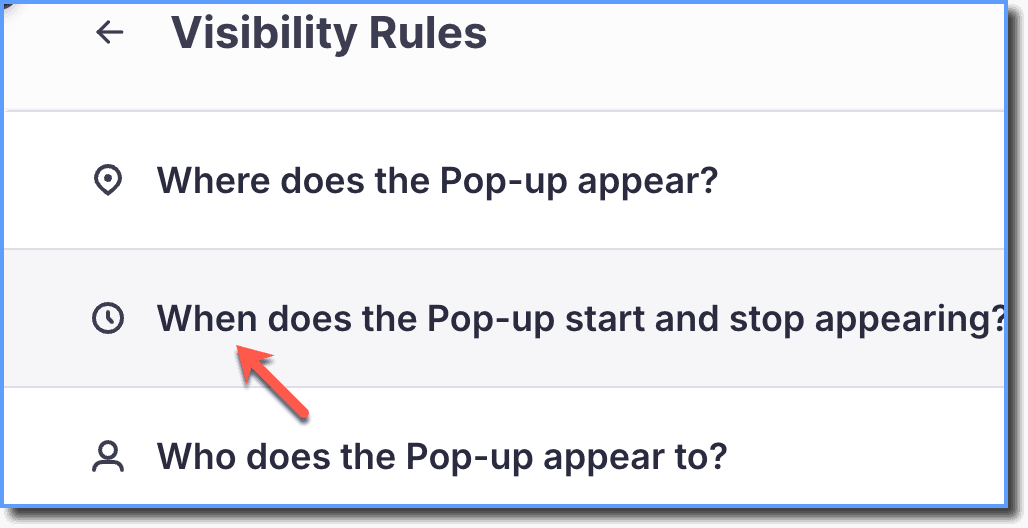
- Click the When tab.
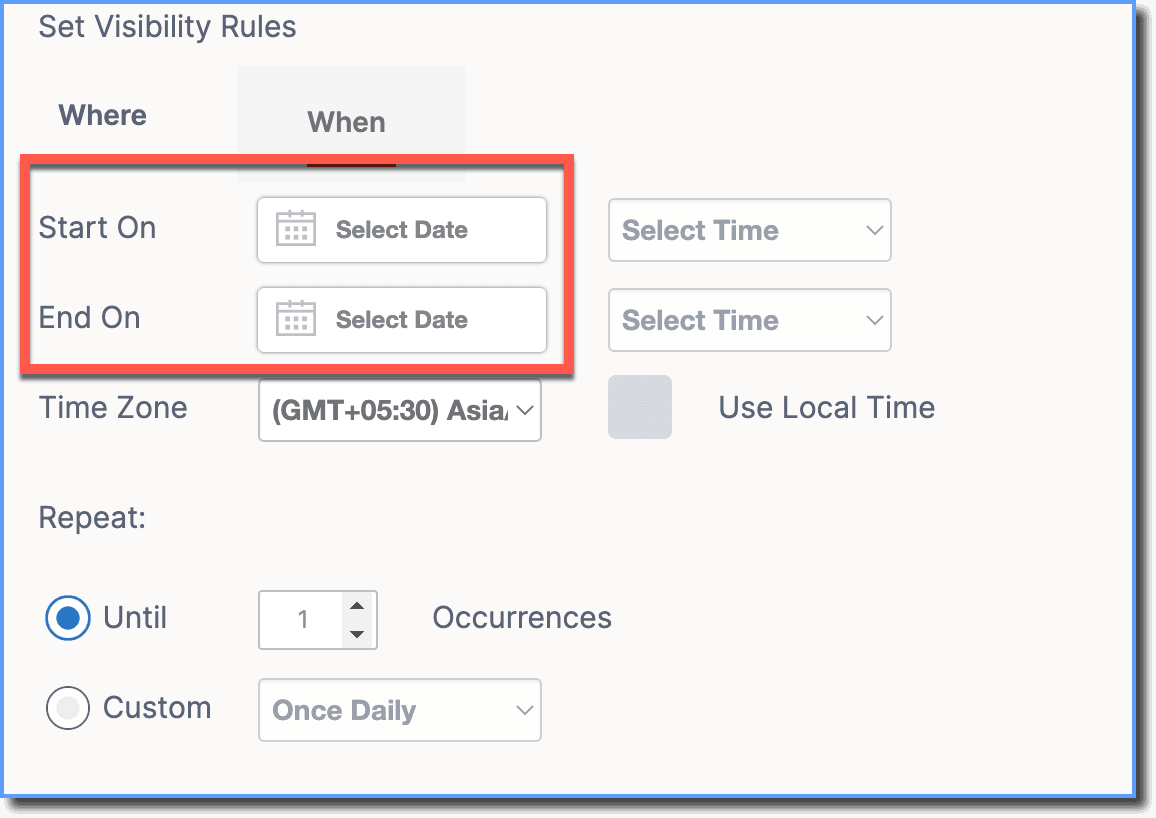
- Use the Start On and End On fields to set the start date and the end date.
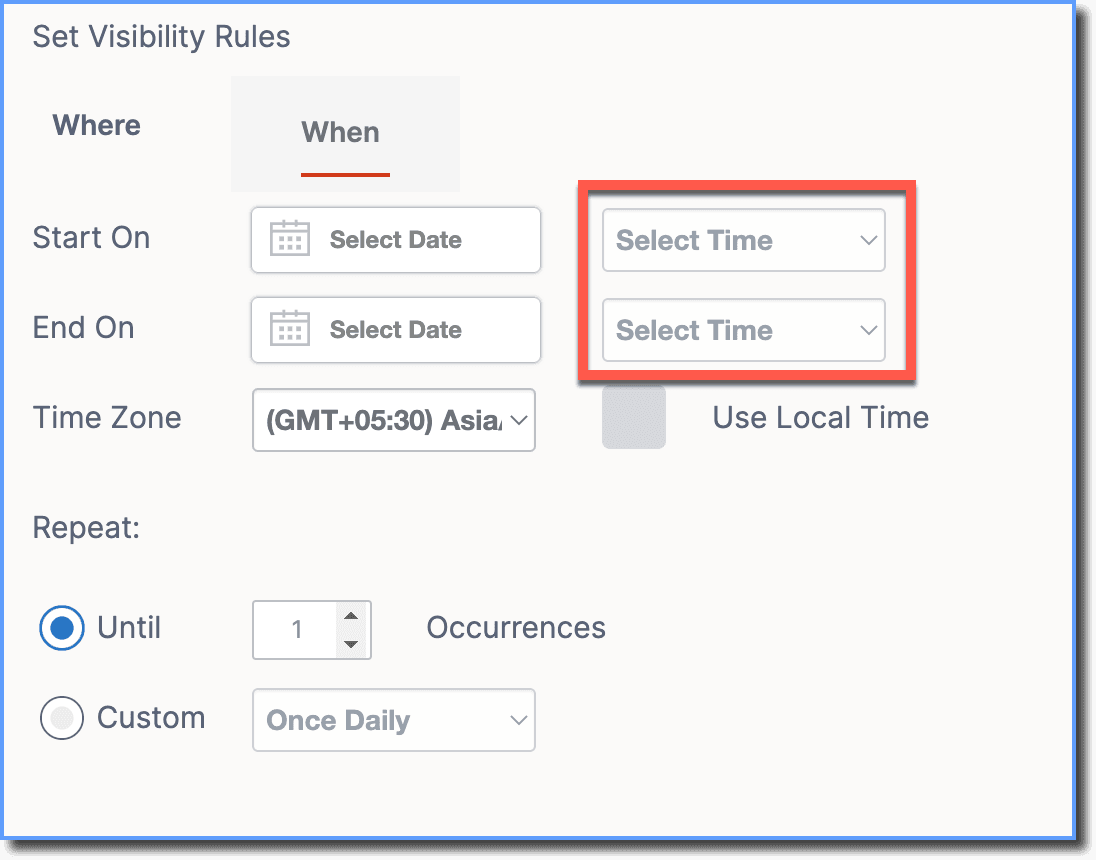
- Use the Select Time fields to set the start time and the end time.
your title goes here
- The Pop-up appears only between the set time duration on the selected dates. For example, if you set the start time at 08:00 and the end time at 21:00, then for the selected dates, the Pop-up would appear between 08:00 and 21:00 every day until the end date.
- When your end users click the Skip button, it is not considered as an interaction and the Pop-up will be displayed to them regardless of the occurrences you have set.
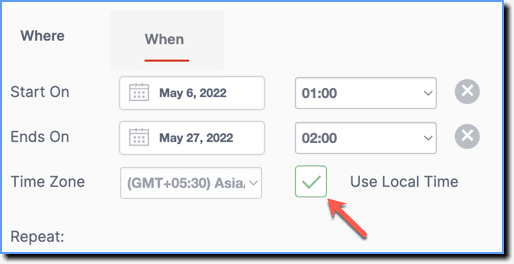
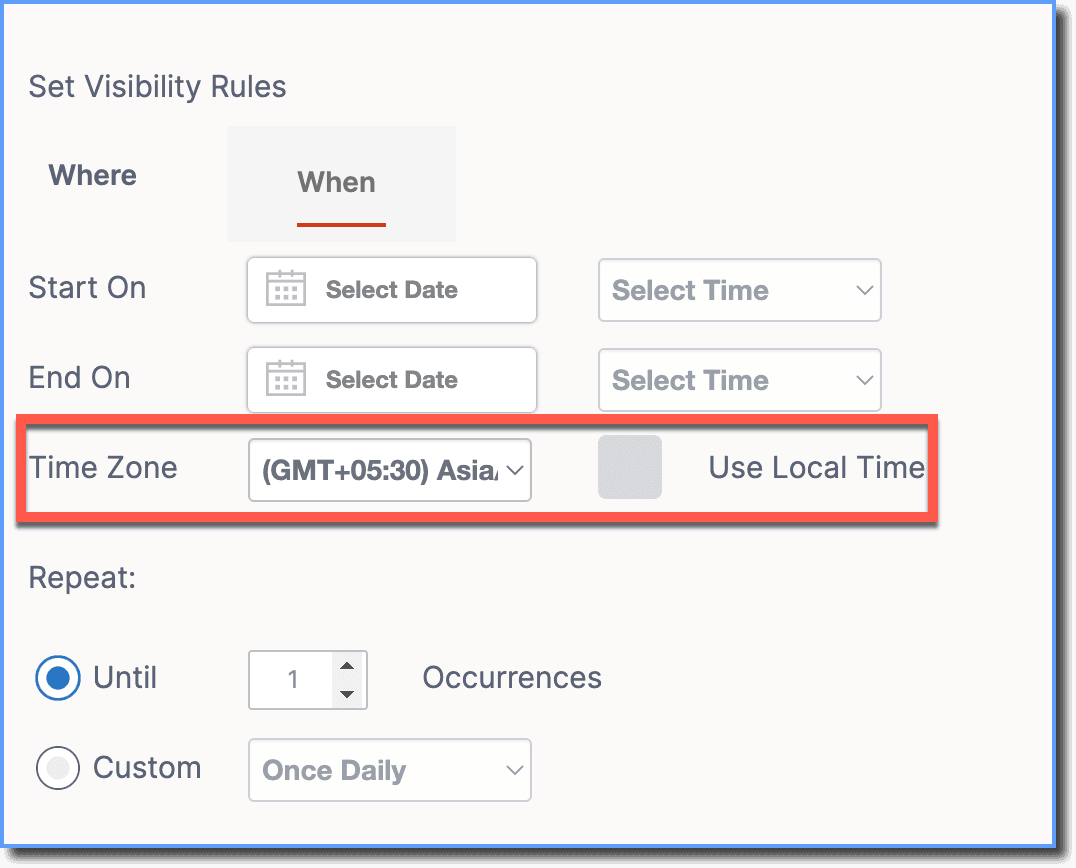
- In the Time Zone field, select the time zone you want the Start On and End On settings to follow. If your end users are from different time zones, then click the Use Local Time checkbox.
your title goes here
When the Use Local Time is selected, the pop up will appear at different times based on the local time. So if you set the pop up to show between 01:00 and 02:00, then the pop up will show when the local time zone is at that time. This means that for a global audience, your users will see the content at different times - whenever the time is 01:00 in their timezone. And it may take as much as 24 hours to ensure that the content is seen by every timezone. However, if this checkbox is unselected, then all your users will see the content together at the set time in GMT.
- Select the frequency to show the Pop-up.
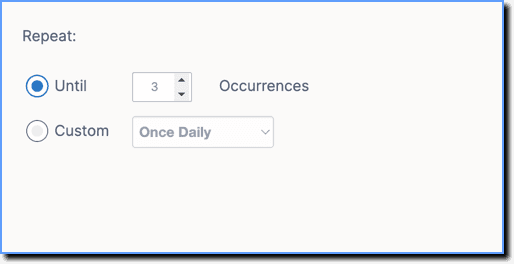
- Click Finish later or Edit Pop-up, depending on your preference. Finish Later: Saves the pop-up as Draft and marks it Inactive. Edit Pop-up: Takes you back to the Pop-up where you can make changes.
Example Use Cases
Display a Pop-up every time a user logs in - forever
Use the following steps to configure the Visibility Rule:
- Do not select Start On and Ends On date.
- Select the Time Zone you want the Start On and Ends On settings to follow.
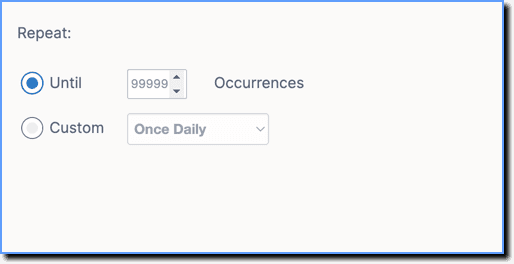
- Under the Repeat section, select Until and enter a large number, for example, 99999.
- Click Finish later or Edit Pop-up.
Note
If you want to disable the Pop-Up, push the Pop-Up segment to the Draft stage. For more information, see Disable a Pop-up.
Display a Pop-up every time a user logs in, but only for a particular time frame
Use the following steps to configure the Visibility Rule:
- Use the Start On and Ends On fields to set the start and end date for your pop-up.
Note
The Pop-Up appears only during this time frame.
- Select the Time Zone you want the Start On and Ends On settings to follow.
- Under the Repeat section, select Until.
- Enter a large number, for example, 99999.
- Click Finish later or Edit Pop-up.
Display a Pop-up only the first time a user logs in
Use the following steps to configure the Visibility Rule:
- Use the Start On and End On fields to set the start and end date for your Pop-Up.
Note
The Pop-Up appears only during this time frame.
- Select the Time Zone you want the Start On and End On settings to follow.
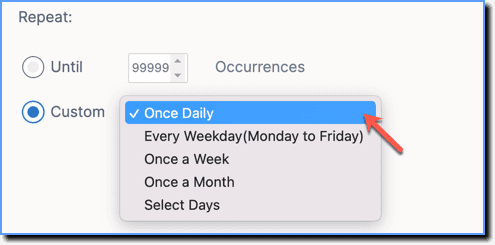
- Under the Repeat section, select Custom.
- Select Once Daily from the dropdown menu.
- Click Finish later or Edit Pop-up.
Display a Pop-up only on particular days of a week
Use the following steps to configure the Visibility Rule:
- Use the Start On and End On fields to set the start and end date for your Pop-Up.
Note
- The Pop-Up appears only during this time frame.
- If you want to show Pop-Up forever, do not select Start On and Ends On date.
- Select the Time Zone you want the Start On and End On settings to follow.
- Under the Repeat section, select Custom.
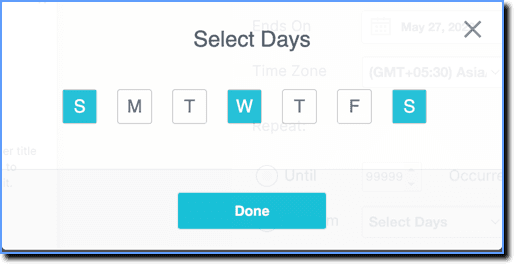
- Select Select Days from the dropdown.
Note
The Pop-up appears only once when using the Select Days option.
- Select the days you want to show the Pop-up and then click Done.
- Click Finish later or Edit Pop-up.
Display a Pop-up only once a week
Use the following steps to configure the Visibility Rule:
- Use the Start On and End On fields to set the start and end date for your pop-up.
your title goes here
The Pop-Up appears only during this time frame.
- Select the Time Zone you want the Start On and End On settings to follow.
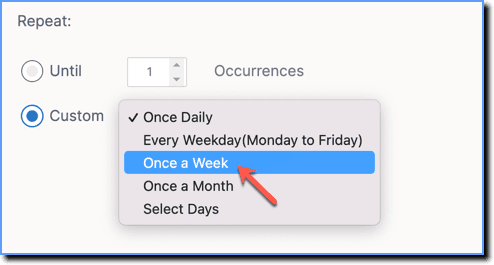
- Under the Repeat section, select Custom.
- Select Once a Week from the drop-down menu.
your title goes here
A new week starts from Sunday by default.
- Click Finish later or Edit Pop-up.
Display a Pop-up only once a month
Use the following steps to configure the Visibility Rule:
- Use the Start On and End On fields to set the start and end date for your Pop-Up.
Note
The Pop-Up appears only during this time frame.
- Select the Time Zone you want the Start On and End On settings to follow.
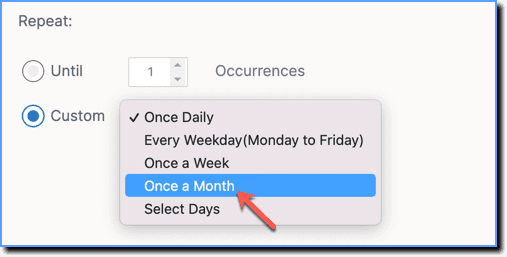
- Under the Repeat section, select Custom.
- Select Once a Month from the dropdown menu.
- Click Finish later or Edit Pop-up.